1. Move the script
As we said before, you shouldn't expect the game where your prop will end up to look the same as yours, so you should include the GIF Player with your prop.
1.1. Move the script in the explorer
Open the explorer and drag the GIFPlayer module from ServerScriptService to your prop folder (in this case AVeryImportantProp)

1.2. Edit the settings
The settings of the GIF panel currently expect the script to be in ServerScriptService, so we need to edit them to point to the new script. Open the Settings script and go to line 4:
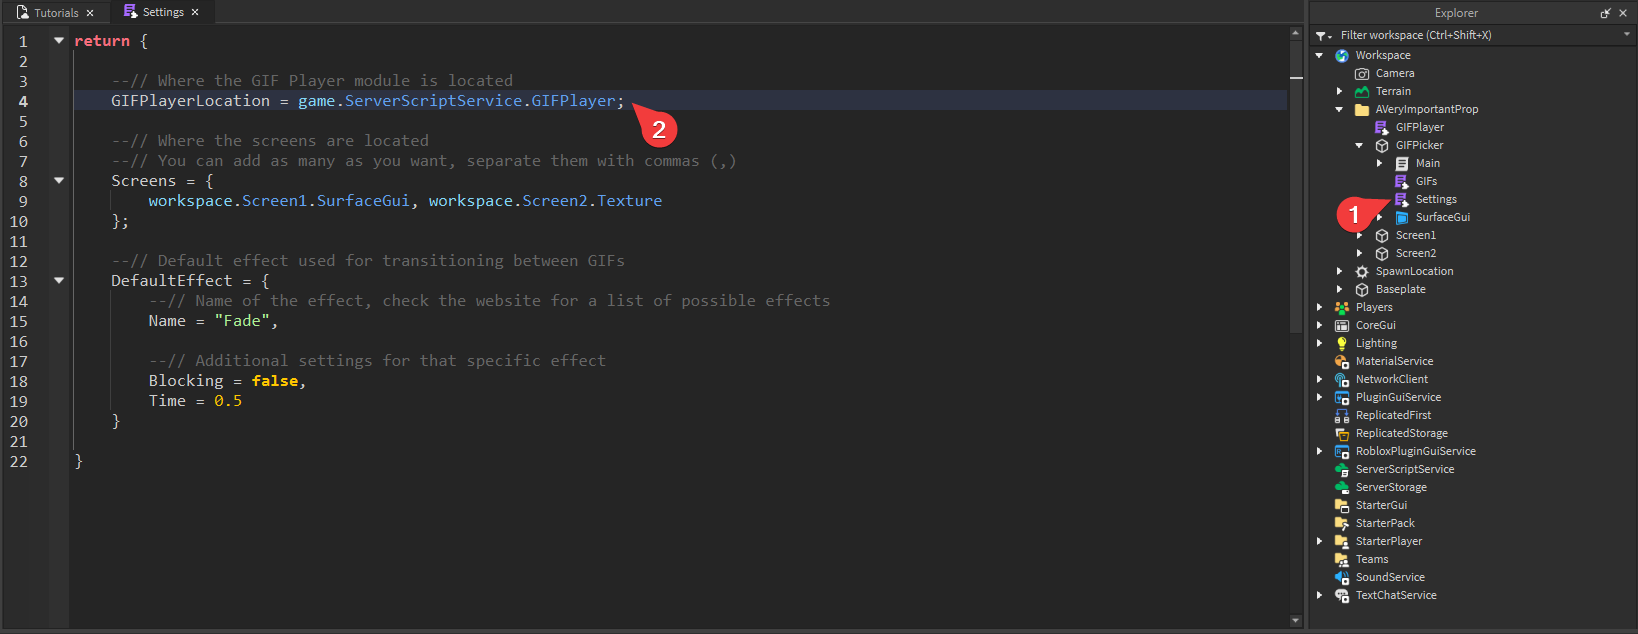
Delete game.ServerScriptService.GIFPlayer from that line. We need to replace it with a relative path to our Player. A relative path means it starts from the Settings script instead of the game.
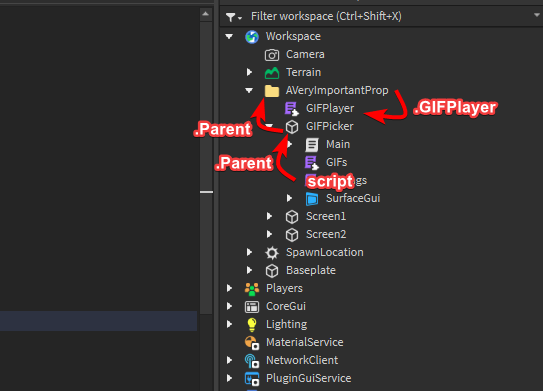
When you write script in a script, you select the script you're currently editing, in this case the Settings script:

Every time you add .Parent, you go 'up' one level in the explorer. So for example, script.Parent in this case would point to the GIFPlayer part:

Our GIFPlayer script is in the same folder as the GIFPicker so we need to write script.Parent.Parent.GIFPlayer to access it:
So, at the end of this step, the Settings script should look like this:
return {

	--// Where the GIF Player module is located
	GIFPlayerLocation = script.Parent.Parent.GIFPlayer;

	--// Where the screens are located
	--// You can add as many as you want, separate them with commas (,)
	Screens = {
		workspace.Screen1.SurfaceGui, workspace.Screen2.Texture
	};

	--// Default effect used for transitioning between GIFs
	DefaultEffect = {
		--// Name of the effect, check the website for a list of possible effects
		Name = "Fade",

		--// Additional settings for that specific effect
		Blocking = false,
		Time = 0.5
	}

}