5. Add the GIF to your game
This page will tell you how to add the GIF you uploaded in the previous step to your panel.
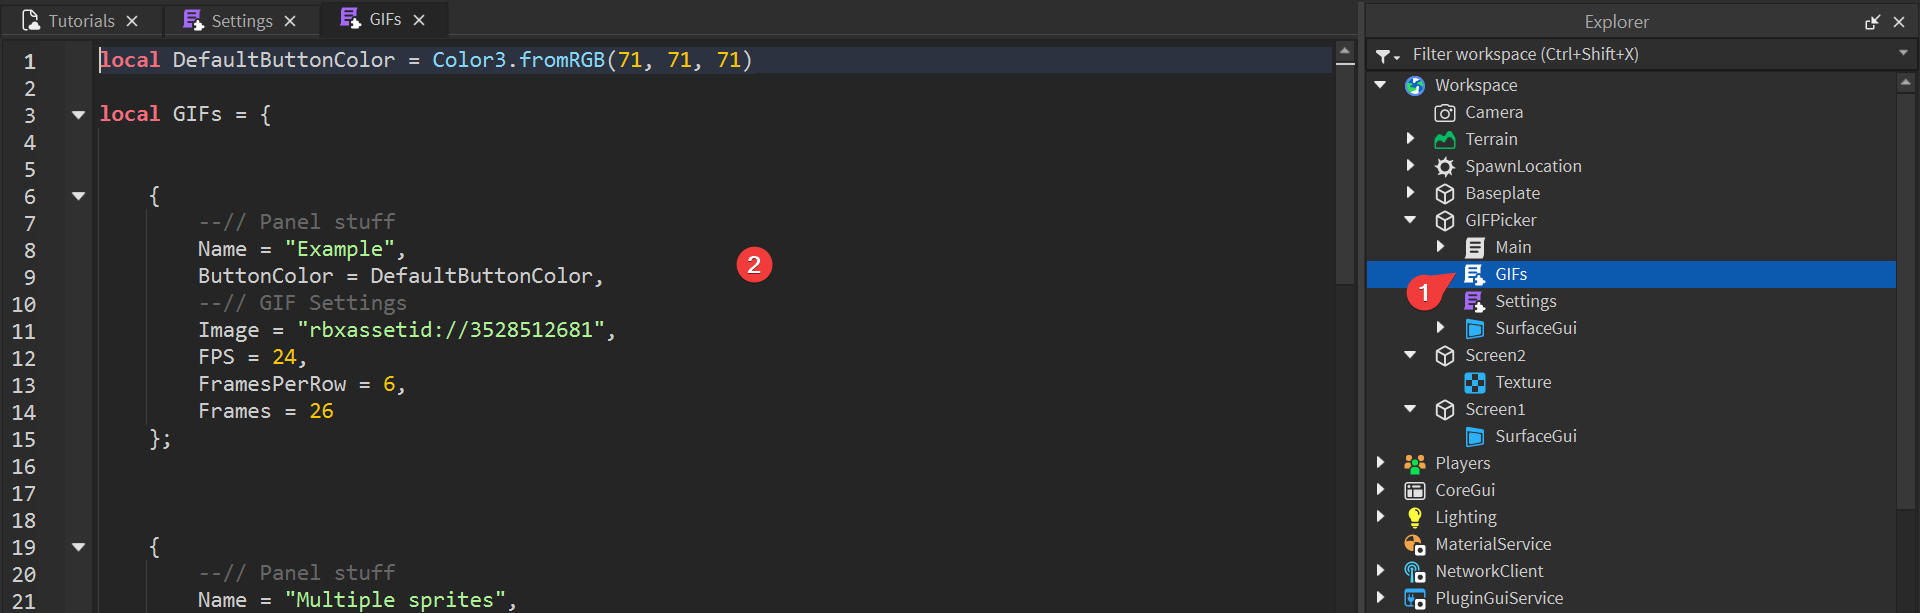
5.1. Open the GIFs script
Go back to Roblox Studio and double click the GIFs script. This script contains the information about all GIFs that should be displayed on that panel. Every panel has its own GIFs script.
5.2. Paste the code you copied earlier
In the previous step, you coped a bunch of text from the converter into your notepad. The text actually contains the settings of the GIF you converted to make it display correctly. The script already has two GIFs inserted, one of them is a more advanced case that we will skip for now.
Paste the text from your notepad into the script, making sure to put it somewhere between the already existing GIFs and not inside of one. After pasting the text, the script should look like this (the numbers might be different depending on the GIF you converted):
local DefaultButtonColor = Color3.fromRGB(71, 71, 71)

local GIFs = {


	{
		--// Panel stuff
		Name = "Example",
		ButtonColor = DefaultButtonColor,
		--// GIF Settings
		Image = "rbxassetid://3528512681",
		FPS = 24,
		FramesPerRow = 6,
		Frames = 26
	};


	{
		--// Panel stuff
		Name = "INSERT NAME HERE",
		ButtonColor = DefaultButtonColor,
   		--// GIF Settings
		Image = "rbxassetid://INSERT_ID_HERE",
		FPS = 25,
		FramesPerRow = 7,
		Frames = 48
	};


	{
		--// Panel stuff
		Name = "Multiple sprites",
		ButtonColor = Color3.fromRGB(61, 80, 99),
		--// GIF Settings
		SpriteSheets = {
			{
				Image = "rbxassetid://5138441857",
				FPS = 2,
				FramesPerRow = 4,
				Frames = 20
			},
			{
				Image = "rbxassetid://3528512681",
				FPS = 24,
				FramesPerRow = 6,
				Frames = 26
			},
		}
	};


}

return GIFs
5.3. Edit the fields
Replace INSERT NAME HERE with the name you want to show up on the panels. Make sure to keep the "", otherwise the system will break.
Name = "your name goes here",
Name = your name goes here
The last thing we need to do is to add the ID of the image you uploaded to the script, so the module can display it. Before we do that, please note that Roblox has 2 different IDs for every image you upload: a decal ID and an image ID. The GIF module accepts only image IDs.
Go to https://create.roblox.com/dashboard/creations?activeTab=Image (this is a different page than before). Press on your image and look at the link of the website. Copy the numbers from that link. For example, if the link is https://create.roblox.com/dashboard/creations/store/106031571560963/configure, copy 106031571560963.
Go back to the script in Roblox Studio. Replace INSERT_ID_HERE the numbers from the link. In our case it looks like this: Image = "rbxassetid://106031571560963". Once again, make sure it's in qoutes.
Image = "rbxassetid://106031571560963",
Image = rbxassetid://106031571560963
Image = 106031571560963
You should copy the IDs from the Images tab, NOT the Decals tab. The IDs on both pages are different and the system only works with Image IDs.
If you're not sure if you copied the correct ID, you can use the ID checker below.
Paste an ID into the field below and press Check to check if it's a correct image ID. You can use:
- IDs -
12345678901234 - Roblox asset IDs -
rbxassetid://12345678901234 - Creator dashboard links -
https://create.roblox.com/dashboard/creations/store/12345678901234/configureorhttps://create.roblox.com/store/asset/12345678901234
In the end, your full GIFs script should look similar to this:
local DefaultButtonColor = Color3.fromRGB(71, 71, 71)

local GIFs = {


	{
		--// Panel stuff
		Name = "Example",
		ButtonColor = DefaultButtonColor,
		--// GIF Settings
		Image = "rbxassetid://3528512681",
		FPS = 24,
		FramesPerRow = 6,
		Frames = 26
	};


	{
		--// Panel stuff
		Name = "Fancy lines",
		ButtonColor = DefaultButtonColor,
   		--// GIF Settings
		Image = "rbxassetid://106031571560963",
		FPS = 25,
		FramesPerRow = 7,
		Frames = 48
	};


	{
		--// Panel stuff
		Name = "Multiple sprites",
		ButtonColor = Color3.fromRGB(61, 80, 99),
		--// GIF Settings
		SpriteSheets = {
			{
				Image = "rbxassetid://5138441857",
				FPS = 2,
				FramesPerRow = 4,
				Frames = 20
			},
			{
				Image = "rbxassetid://3528512681",
				FPS = 24,
				FramesPerRow = 6,
				Frames = 26
			},
		}
	};


}

return GIFs