2. Create the screens
On this page we'll create two screens, a normal rectangular one and a round one. You're free to use any combination of screens in your game, but we want to show you how to use the different shapes correctly.
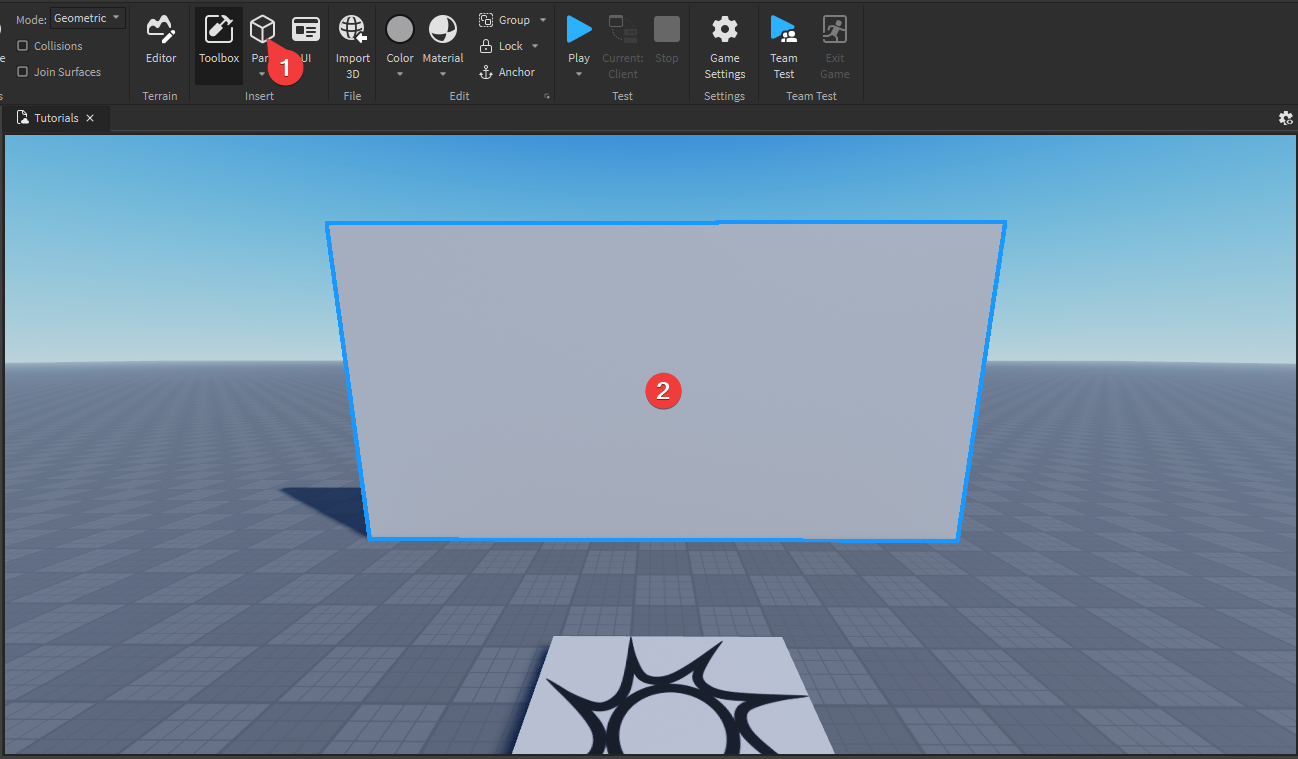
2.1. Create a rectangular screen
Insert a normal part into your game by pressing the Part button on the toolbar. Resize it to look like a screen.
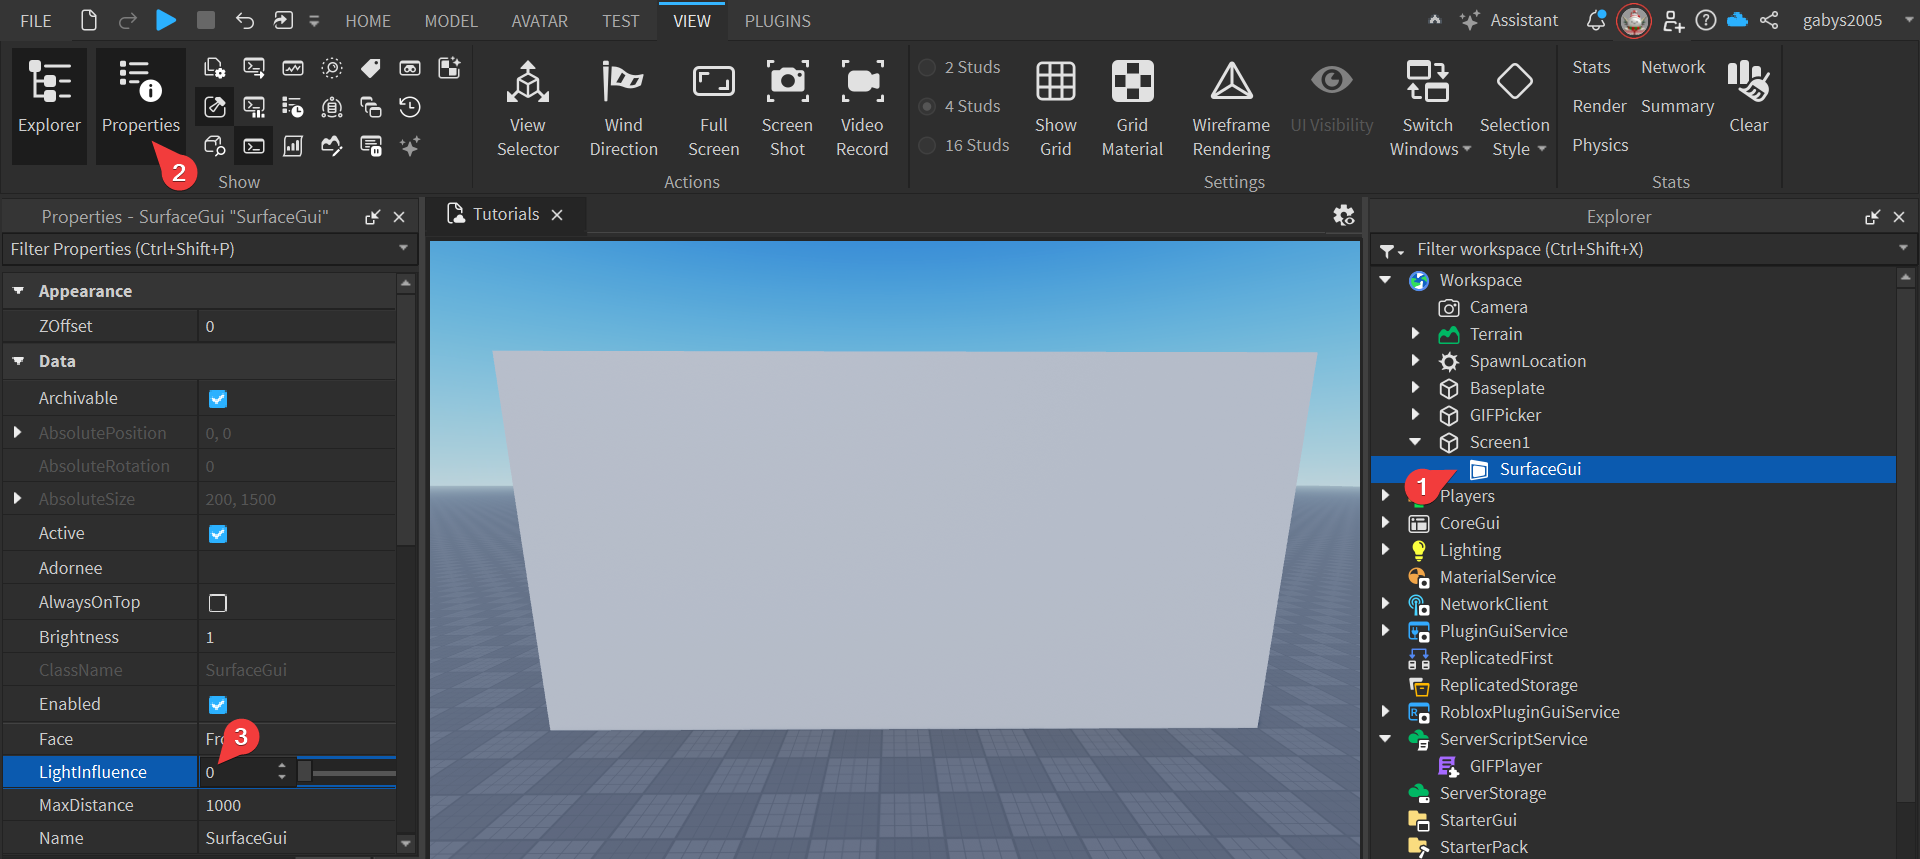
Select the part in the Explorer window. Press F2 on your keyboard and rename it to Screen1.

After that, hover over it in the Explorer and press the + button that appears. Select SurfaceGui from the menu that shows up.


Select the SurfaceGui you have just inserted and open the Properties window (go to View and press Properties). Look for the LightInflunce property and change it to 0. This will make the screen glow in the dark so it's always visible.
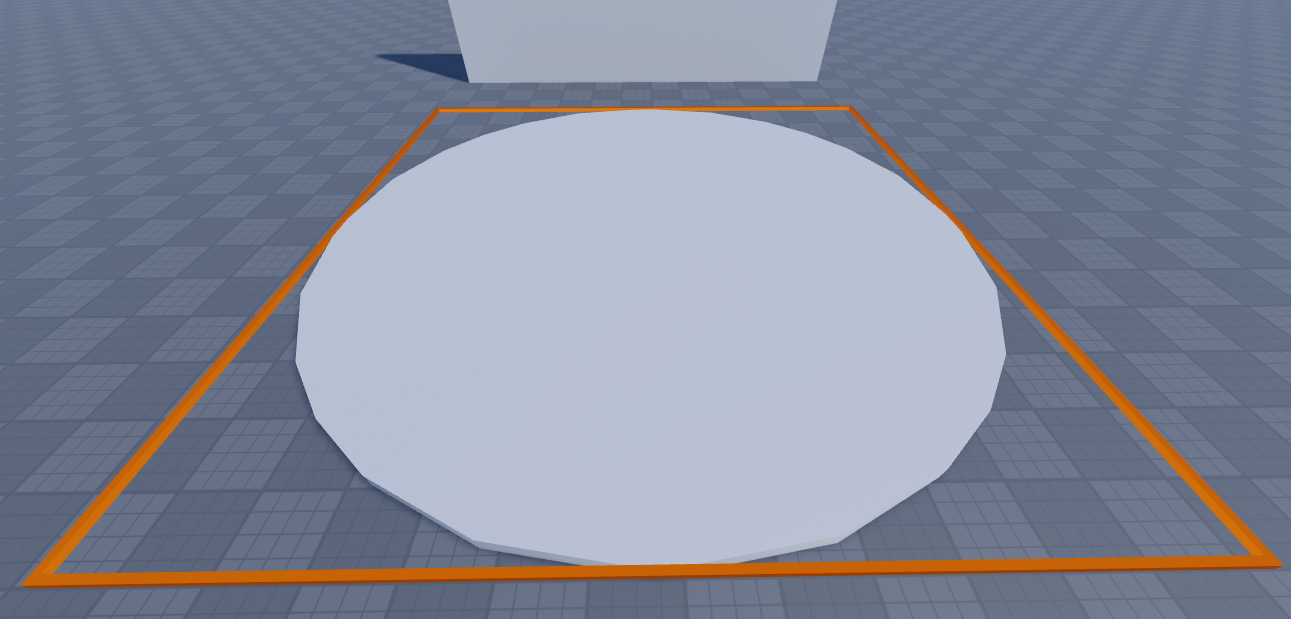
Move your camera to the edge of the part. You should see a blue line at the edges of one of the faces of the part. If the lines are on the 'front' of the screen, you don't have to do anything else. If they're not, look for the Face property and change it until the lines align correctly.

2.2. Create a round screen
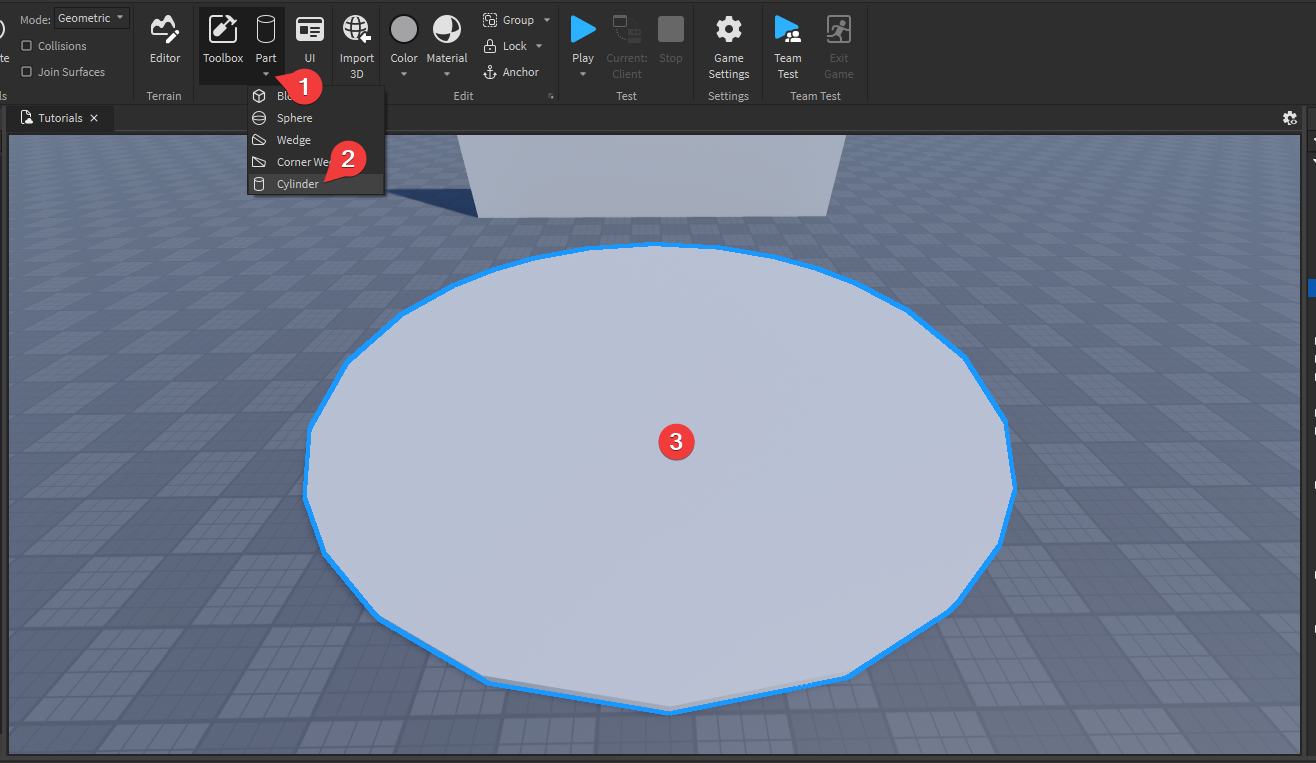
Insert a cylinder into your game by pressing the little v button below the part button and selecting Cylinder. Resize it to look like a stage base. Rename it to Screen2. Insert a Texture into it. When you're inserting a Texture, you should be able to select the face it goes on without digging through properties. Select the correct face and place the Texture.


Explanation
Most of the time you'll want to use SurfaceGuis on your screens, as they can glow in the dark. However, Roblox doesn't wrap them properly around non-rectangular shapes. This means that they'll always be displayed as if they're on a normal part. In those cases you might want to use Textures instead.