3. Configure the settings
The GIF panel contains some settings that can be changed. In this tutorial, we'll focus on only one that has to be changed to connect your screens to the GIF system.
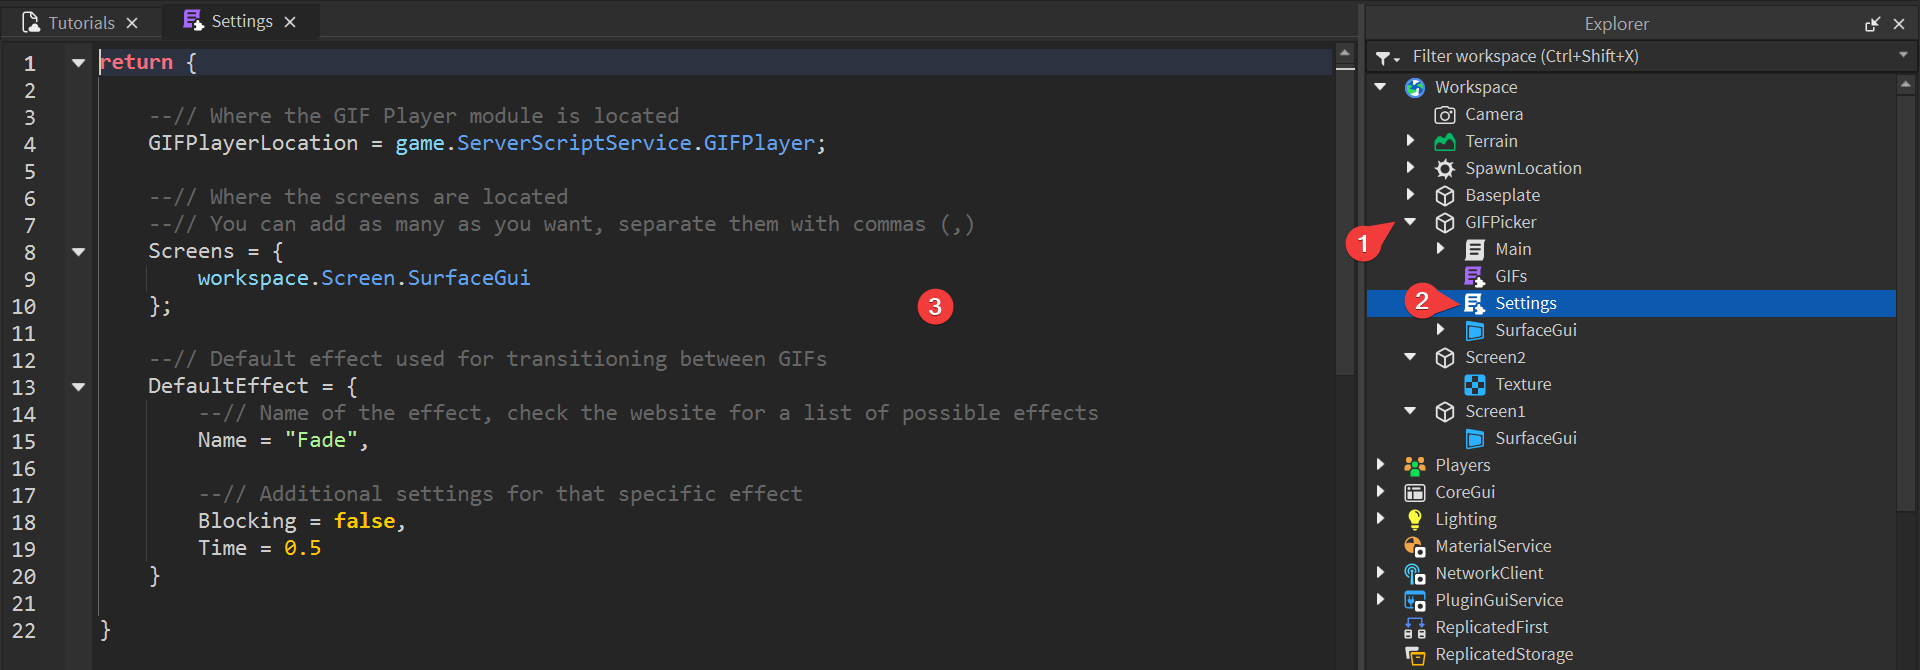
3.1. Open the Settings script
In the Explorer, press the arrow next to GIFPicker and double press the Settings script. You should see the code editor show up on your screen.
3.2. Add the first screen
Locate the Screens setting. It should be on line 8.
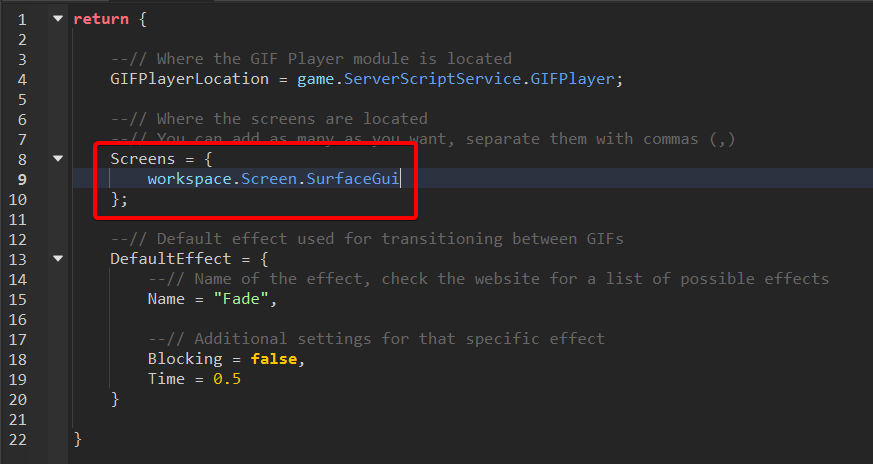
This setting tells the system where your screens are located. Please note that by 'screen' we mean a GUI or a texture, not the part. You'll need to write the 'path' Roblox should take to find your screens.
By default, the setting points to a screen named Screen, but none of our screens are named that, so remove workspace.Screen.SurfaceGui from your script to start adding screens from scratch.

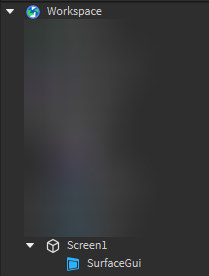
Put your cursor on line 9 (it should now be an empty line) and put workspace.Screen1.SurfaceGui. Let's stop here and analyse what you wrote. workspace is the Workspace folder in explorer. Every time you write a dot (.), you go one level 'deep' into the Explorer tree. In other words, workspace.Screen1.SurfaceGui can be represented as looking for:
workspace
    -> Screen1
        -> SurfaceGui
Which is exactly where the SurfaceGui is located in our game.
If you have two objects named the same thing on the same level, Roblox will pick one randomly. Try to avoid situations where multiple screens are named the same, for example Screen.
Try to avoid putting spaces or special characters in the names of your screens.
3.3. Add the second screen
Let's continue where we left off. We actually have two screens in the game, but so far we added only one. To add the second one, add a , at the end of the line to separate the two screens in the list and write the path of the 2nd screen. It's named Screen2 and has a Texture instead of a SurfaceGui, so you should add workspace.Screen2.Texture.
In the end, the script should look like this:
return {

	--// Where the GIF Player module is located
	GIFPlayerLocation = game.ServerScriptService.GIFPlayer;

	--// Where the screens are located
	--// You can add as many as you want, separate them with commas (,)
	Screens = {
		workspace.Screen1.SurfaceGui, workspace.Screen2.Texture
	};

	--// Default effect used for transitioning between GIFs
	DefaultEffect = {
		--// Name of the effect, check the website for a list of possible effects
		Name = "Fade",

		--// Additional settings for that specific effect
		Blocking = false,
		Time = 0.5
	}

}
Make sure there is only one set of { and } in the Screens setting. People often put multiple sets of the brackets, which causes the system to break.
Screens = {
   workspace.Screen1.SurfaceGui, workspace.Screen2.Texture
};

Screens = {{
   workspace.Screen1.SurfaceGui, workspace.Screen2.Texture
}};

Screens = {
   {workspace.Screen1.SurfaceGui, workspace.Screen2.Texture}
};